
Taking A Fun Hot Glass Class on Celebrity Solstice

DISCLOSURE: Stylish Cruising contains affiliate links and is a member of the Amazon Services LLC Associates Program, as well as affiliate programs with other companies. If you make a purchase using one of these links, we may receive compensation at no extra cost to you. To learn more, please see our Privacy Policy.
While on our first cruise on Celebrity Solstice, we took a hot glass class, something we’d never done before. And was it ever fun!


About The Hot Glass Classes
Celebrity Cruises offers beginning glassblowing classes to their passengers on three ships: Celebrity Solstice, Celebrity Equinox, and Celebrity Eclipse. From 2008 to 2018, the class was given in conjunction with the Corning Museum of Glass, and since that partnership ended, has been offered through a partnership with Hollywood Hot Glass, a glassblowing studio in Hollywood, Florida.
As a former antique dealer who dealt primarily in glassware, I have an extensive collection of glass ranging from early American pressed glass to contemporary art glass. Glass is my thing, you could say, so when we booked a cabin on Celebrity Solstice, which has a hot glass studio, I signed myself up right away for a class. To my surprise, my husband, Myron, insisted he wanted to take the class too.
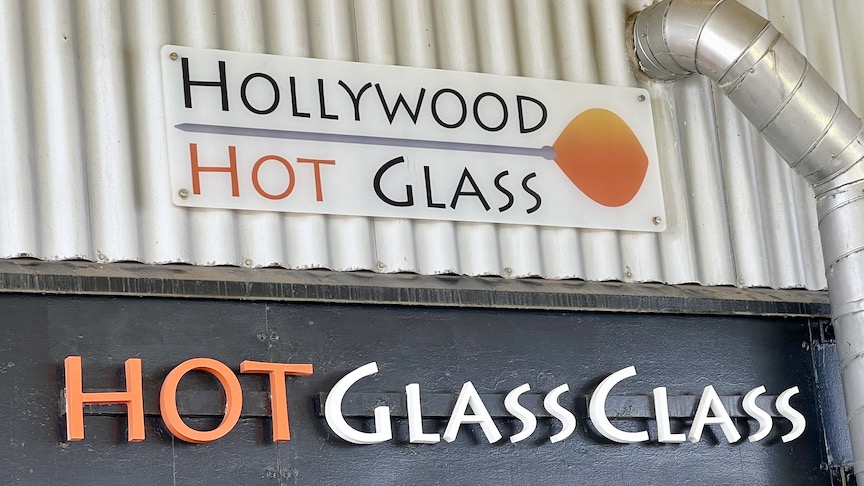
Wanting to know what to expect, Myron and I showed up early for our class to watch a couple of people ahead of us. Thankfully, a few rows of benches are available for spectators.
We watched carefully and our diligence paid off. One of the instructors told us later that we were the best husband-and-wife team of students they’d had. Of course, they probably tell everyone that, but it was nice to hear.

What To Expect
The class only takes twenty minutes but is given in an open-air studio, so take the air temperature into consideration when dressing for your class. Dress comfortably in casual clothing.
What Is Involved In The Class
The first step is to choose what piece you want to make, and in what color combination. You choose from fifteen different pieces, including a glass sphere on a stand, a soap dispenser, a simple vase, a simple bowl, a wave vase, a wave bowl, a flower, a pumpkin, a sphere paperweight, a star paperweight, a heart paperweight, a circular paperweight, a fish, or a whale.
The process will be slightly different for everyone, depending on what piece of glass you decide to make in the class. I decided to make a wave bowl, which is seen in the upper right-hand corner of the pieces displayed in the photo below. What follows is the steps that were taken to make a bowl.
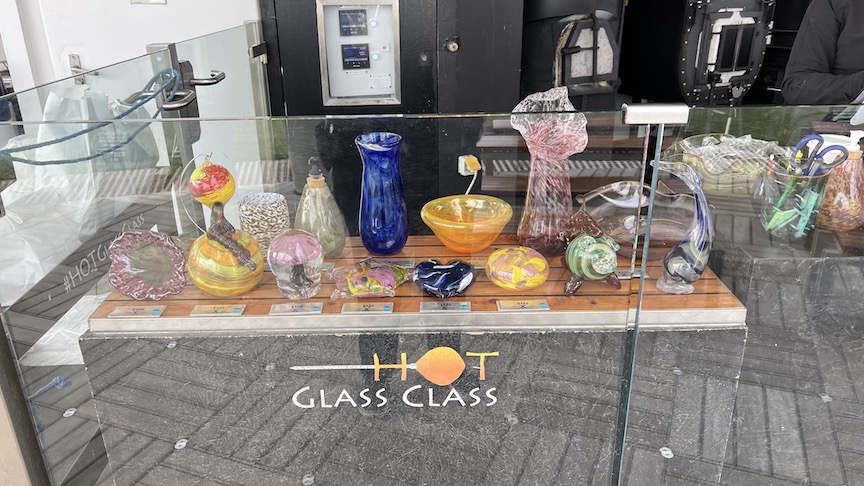
First, I chose to make the wave bowl, as seen below, which upped my class price from $120 to $200. Then I chose my colors: blue, sea green, and white.
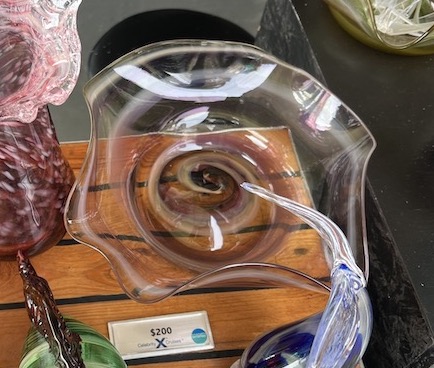
Finally, the class began! I aside as my instructor, Luke, gathered glass on the end of a rod to start my piece, then was allowed to turn the rod holding it after the glass was placed in a furnace, or glory hole, to begin heating it.

Once the glass was hot, I helped the instructor place the glowing orange glass into bowls of varying shades of tiny pieces of glass in the colors I’d picked for my piece.

Once the glass was heated again and shaped by rolling it onto a flat surface, I was asked to take the small pair of tongs to pinch the end of the glass and pull, stretching it out.

After the instructor used shears to snip off some unwanted glass, the remainder of the glass went back into the glory hole, and I was allowed to turn the rod while it heated.

After the glass had been blown a little by the instructor to make it larger, and it was time to shape. The instructor had me sit on the bench and hold a wooden mold below the glass as he twirled it, making the heated glass conform to the rounded shape of the mold.

Here, I’m blowing into the glass, introducing more air into it.

Using large tongs, I squeezed the glass to create a neck, which will be cut off later.

Here I’m blowing again to introduce more air, making the glass larger and thinner.

Again, using the tongs to pinch the neck of the glass.

At this point, it was time to flatten the bottom of what would be a bowl with a wooden paddle.

As the instructor heated a small blob of glass, known as a pontil, that would be added to the center of the flattened bottom of the piece, I twirled the glass, helping it maintain the shape we’d given it.

After the instructor had added the pontil to the bottom of the piece we’d made and cut it free from the original rod, transferring the bottom of what will be the bowl to another rod, it was time to open the bowl. Here, I’m using large tongs to open the end of the glass.

Next, it was time to spread the tongs, opening the edges of the bowl even more as the instructor twirled the rod.

After heating the glass again, the instructor twirled the glass, opening it into what finally looked like a bowl. The colors were very orange at this point due to how hot the glass was.

Once he’d twirled the glass enough with the rod in a horizontal position, the instructor lowered the rod with the opening of the bowl toward the floor, still twirling it slowly, and waves rapidly appeared in the edges of the glass. Don’t blink or you’ll miss it.

The glass had cooled slightly, revealing the colors that it would eventually be, and the instructor placed a few drops of water strategically around the pontil, stressing the glass.

Here, I’m about to tape the rod to release the bowl from the pontil, which is known as cracking off.

The final step in the class was when the instructor used a blowtorch to heat the pontil of the bowl, melting the sharp glass to make it smooth.

The class was over, and reluctantly, I had to leave my bowl to be placed in the annealer for several hours. The next day, it was ready for pickup, wrapped carefully for me to transport home.
Myron had gone first and made a beautiful wave vase, and now we were done. Who knew it would be so much fun to take a hot glass class on a ship?

The Final Product
Back home, I was thrilled to open my new bowl from its wrapping and get my first look at the colors. It’s gorgeous!

Tips For Attending Celebrity’s Hot Glass Class
After having taken the class, I have a few tips for you if you’re considering taking it too.
- Sign up for the class before the cruise. Time slots are limited, and the class sells out fast.
- Once onboard, be sure to go to the Hot Glass Studio on Day One to meet the instructors and choose your time slot.
- While you’re there, peruse the choices and decide which piece you want to make and in what colors.
- When choosing your piece, take into consideration how far you have to travel home. If you’re driving home, it’s not a big deal to choose a larger or more fragile piece. But if you’re flying, you might want to choose a smaller, more durable piece like a paperweight.
- If you do choose a fragile piece and are flying, either pack it in a carry-on that you won’t be checking or carry it home in a tote bag like I did. Luckily, we only had a 45-minute flight home, so I didn’t have to worry quite so much about the safety of my piece.
- Before your class, take some time to be a spectator and watch an entire class so you’ll know what to expect.
- Be sure to pick up your piece the next day.
Final Thoughts on Celebrity’s Hot Glass Class
We had a fabulous time in the hot glass class on Celebrity and are looking forward to taking it again. We’ll be on the Solstice again for our upcoming Hawaii cruise next year, and on the Eclipse for a Caribbean cruise later that year, so we have plenty of opportunity.
Want to learn more? Head over to Celebrity’s website for more information.
Happy cruising!

LET’S BE SOCIAL: Follow us on Facebook, Instagram, Pinterest, and YouTube.
Planning to book a cruise? We have some tips for you.